
NestJS Overview เล่าสู่กันฟัง
NestJS Overview เล่าสู่กันฟัง
บทความนี้จะเล่าถึง Overview ของ NestJS ว่าประกอบไปด้วยอะไรบ้าง ที่เป็น core หลักๆ ที่เราน่าจะได้ใช้กันนะครับ
โดยจะพูดในเรื่องเหล่านี้นะครับ
Controllers
Providers
Pipes
Modules
Middleware
ในรูปแบบ Basic สุดๆ กันนะครับ
สิ่งที่จะต้องเตรียมกันก่อนนะครับ
Project NestJS ถ้าไม่รู้จะเริ่มยังไงลองดูตามนี้ก่อนนะครับ
NestJS เข้าใจไม่ยาก ถ้าเราลงมือ บทความนี้เป็นบทความ Introduction NestJS ฉบับ Basic…medium.com
Postman ( เอาใว้ใช้ในการยิง API )
Postman | The Collaboration Platform for API Development Make any kind of API call-REST, SOAP, or plain HTTP-and easily inspect even the largest responses. Postman also has…www.postman.com
เมื่อเรามีครบแล้วเรามาเริ่มกันเลยครับ
Controller
controller มีหน้าที่รับผิดชอบเกี่ยวการกับรับ request และ return response ไปยัง client
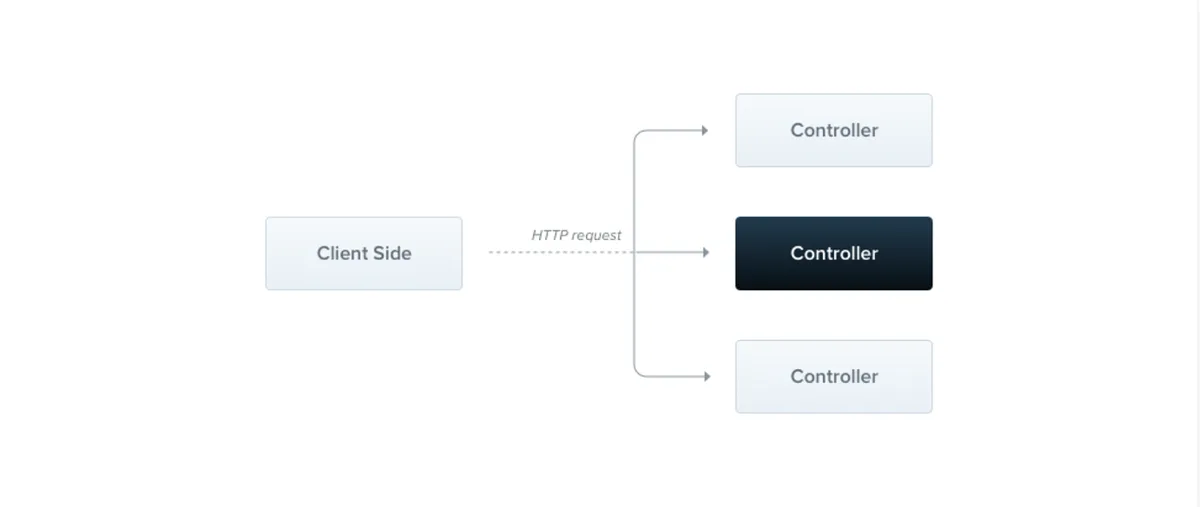
จากรูป controller หน้าที่หลักๆ คือการรับค่า request และ routing จะทำการกำหนดว่า request นั้นจะไปใช้งาน controller ไหน เราสามารถใช้งาน controller เดิมจากหลาย route ได้ หรือใช้แตกต่างกันก็ได้เช่นกัน
มาลองสร้างกันเลยครับ
nest g controller cats
ผลลัพธ์ที่ได้คือจะมี file ถูกสร้างขึ้นจำนวน 2 file
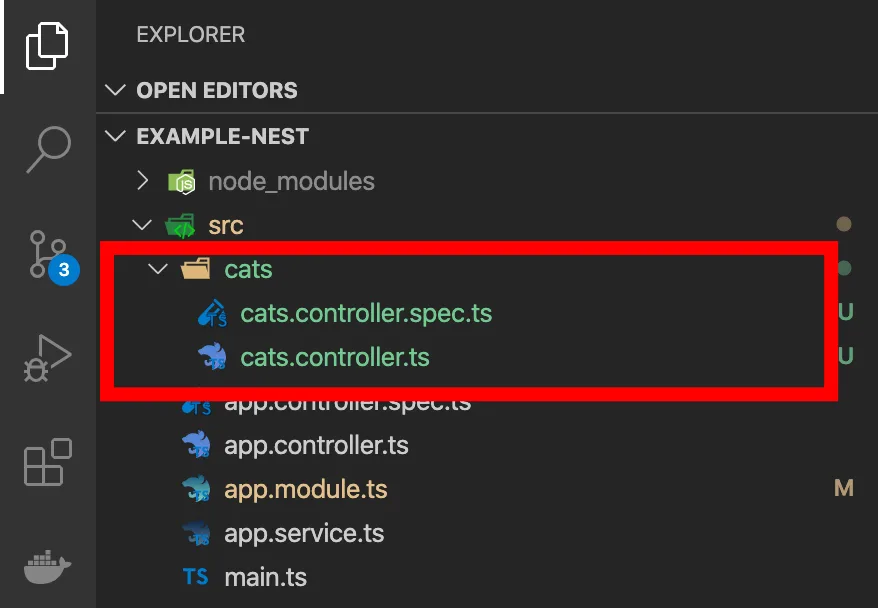
file cats.controller.spec.ts เป็น file สำหรับทำ testing
file cats.controller.ts เป็น file controller ที่จะรับ request และ return response
และยังมีอีก file ที่มีการแก้ไขนั้นคือไฟล์ app.module.ts
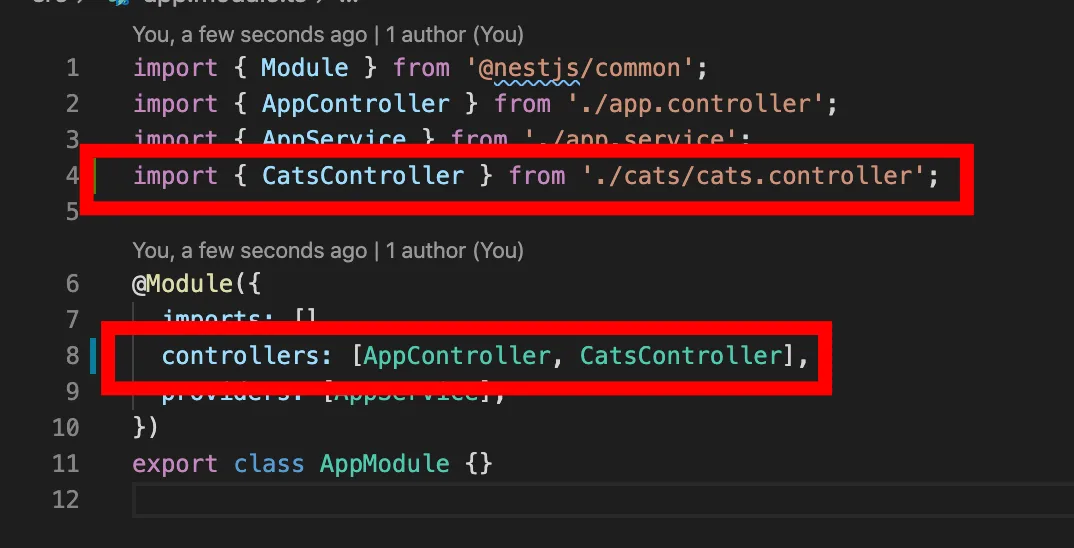
การแก้ไขของ file นี้คือ มีการ import cats.controller และมีการเรียกใช้ใน module
จากนั้นให้เราไปที่ file cats.controller.ts และเพิ่ม code ตามนี้ครับ
จากนั้นทำการ start project และทำการ get api จาก http://localhost:3000/cats ด้วย postman
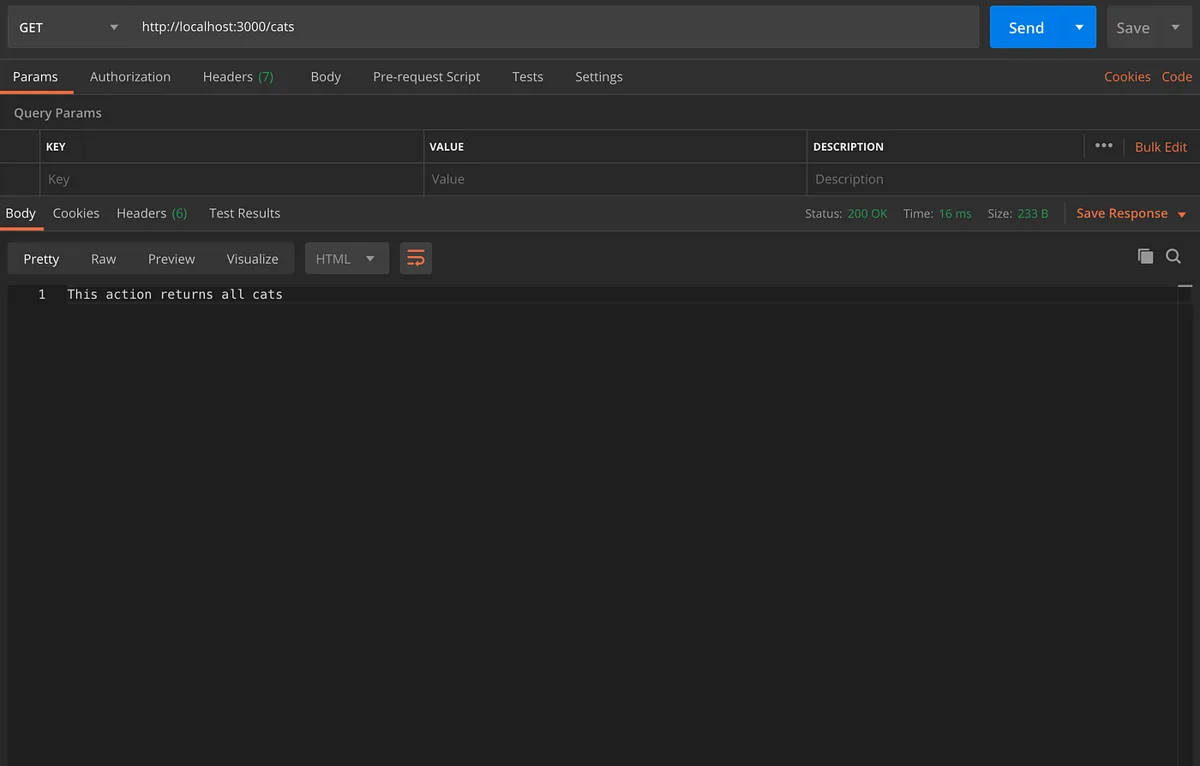
เราจะได้รับ response ตาม basic ที่ NestJS สร้างให้ครับ เราสามารถใช้ Get, Post, Put, Delete ได้ด้วยการ import จากตัว @nestjs/common ได้เลย ตัวอย่างในการรับ request
ศึกษาเพิ่มเติมไปตาม link ได้เลยครับ
Providers
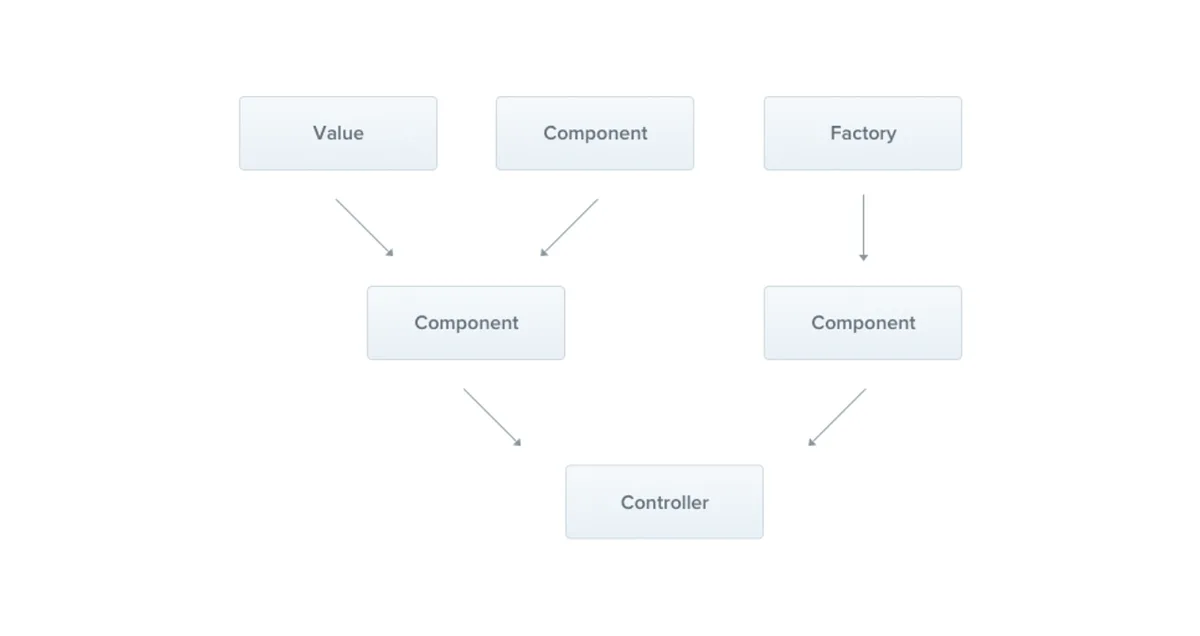
Providers เป็น concept สำคัญหลักของตัว NestJS และ class ของ NestJS ส่วนใหญ่จะเป็น provider ส่วนภายใน provider จะประกอบไปด้วย services, repositories, factories, helpers, etc
แนวคิดหลักของ provider เราสามารถ inject dependencies หรือส่วนต่างๆ มาใช้ได้ทันทีที่ต้องการ โดยทุกๆ คลาสใน NestJS สามารถเป็น Provider ได้ทั้งหมดเพียงแค่ใส่ @Injectable() ลงไปเท่านั้น
ตัวอย่างการสร้าง provider ที่เป็น Service
nest g service cats
จากนั้นเราจะได้ file ดังนี้
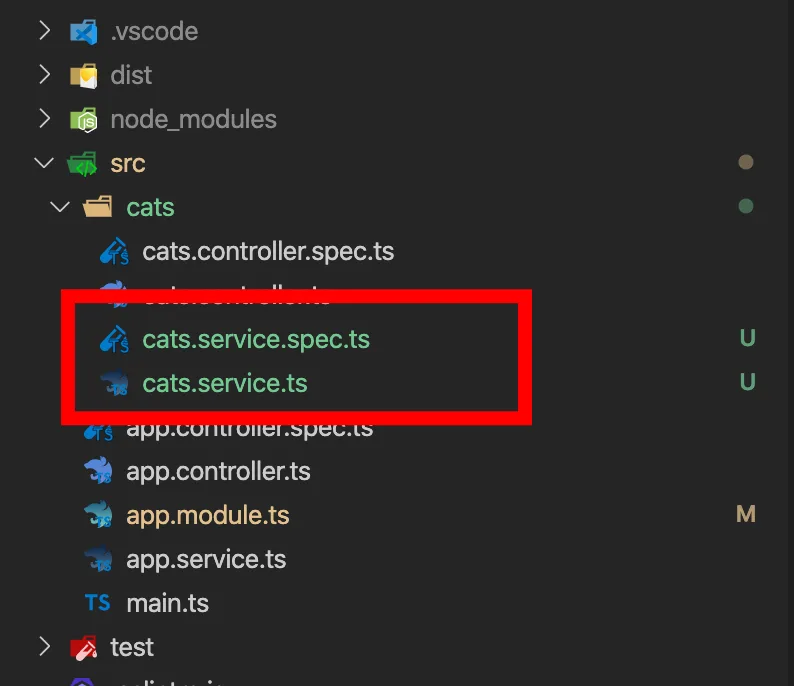
cats.service.spec.ts เป็น file สำหรับทำ testing
file cats.service.ts เป็น file service ที่เป็นส่วน provider
จากนั้นสร้าง file .interface ขึ้นมา เพื่อระบุค่าของ Objects/Class cats
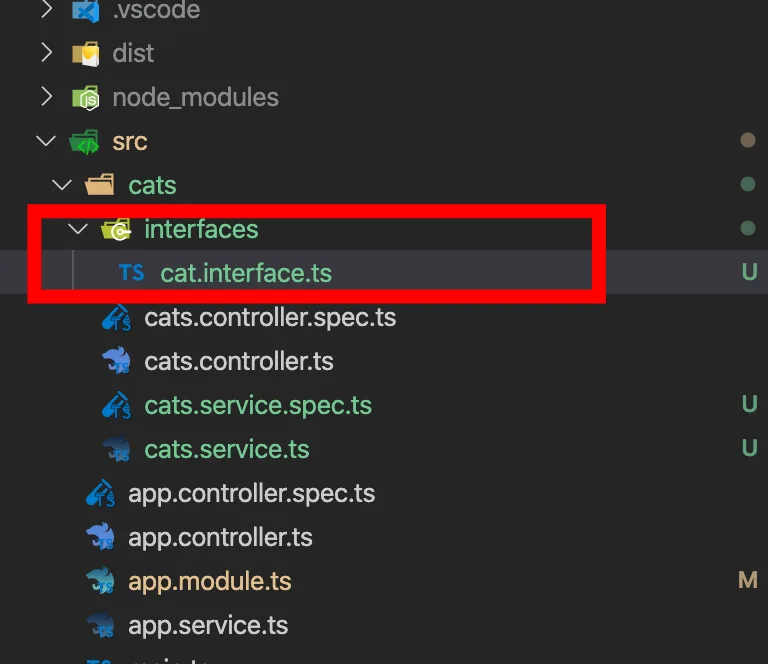
ภายใน file .interface เพิ่มตามนี้ครับ
ภายใน file service เพิ่ม code ตามนี้ครับ
เพื่อกำหนดค่าของ request จาก Client กับ Server สร้าง file dto
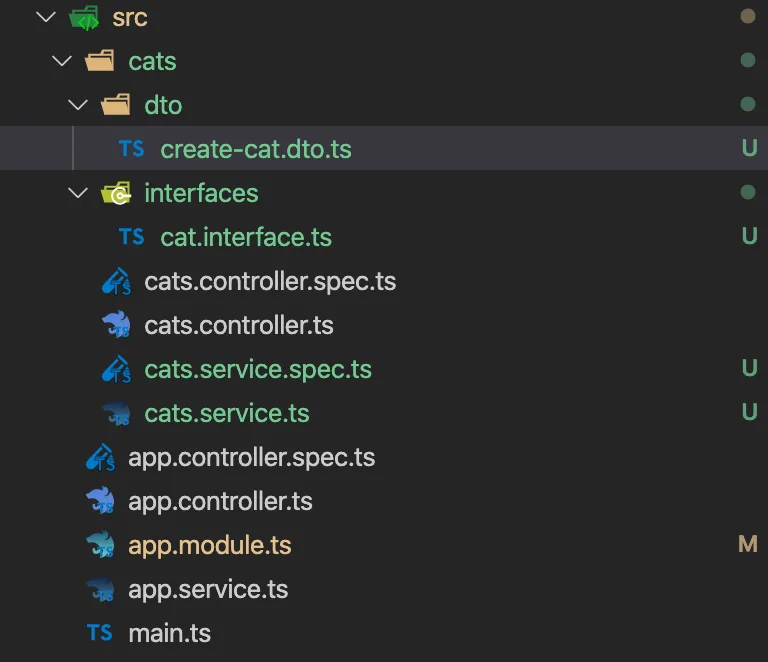
ภายใน file .dto เพิ่ม code
จากนั้นมาเริ่มการใช้งานกันครับ
แก้ไข file cats.controller.ts
จากนั้น start project และลองยิง Request ไปยัง http://localhost:3000/cats ทั้ง 2 methods คือ GET และ POST
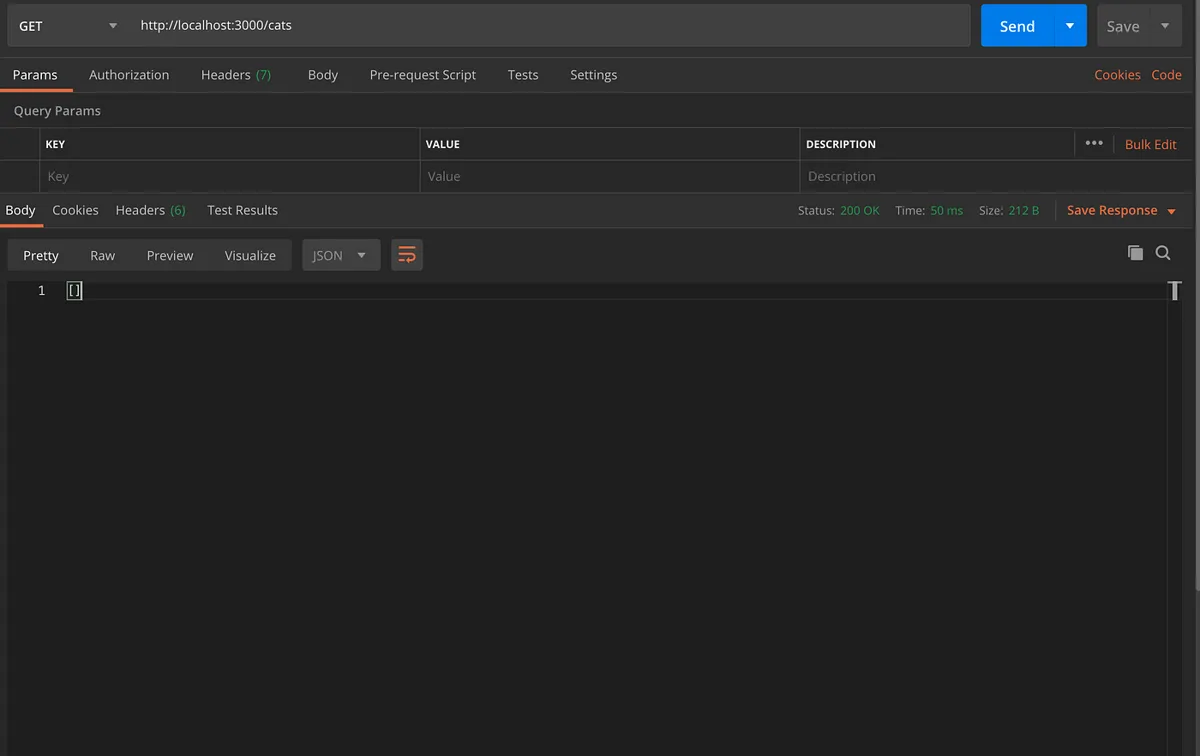
method GET เมื่อเริ่มต้นจะยังมี response ออกมาเป็น array เปล่าจนกว่าจะมีการเรียกใช้งาน method POST ที่ภายใน controller มี service create cats
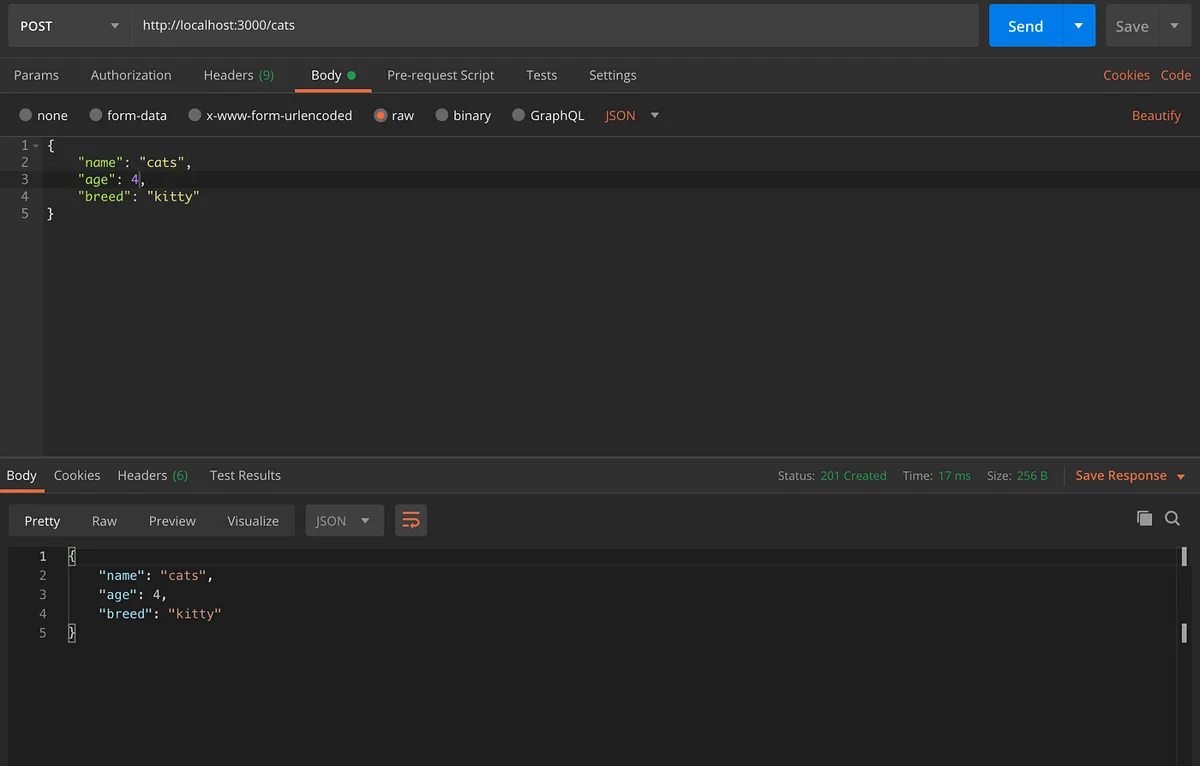
เมื่อใช้งาน method POST จะเป็นการเพิ่ม cats เข้าไปและเมื่อมีการเรียกใช้ method GET จะพบว่ามี response กลับมา
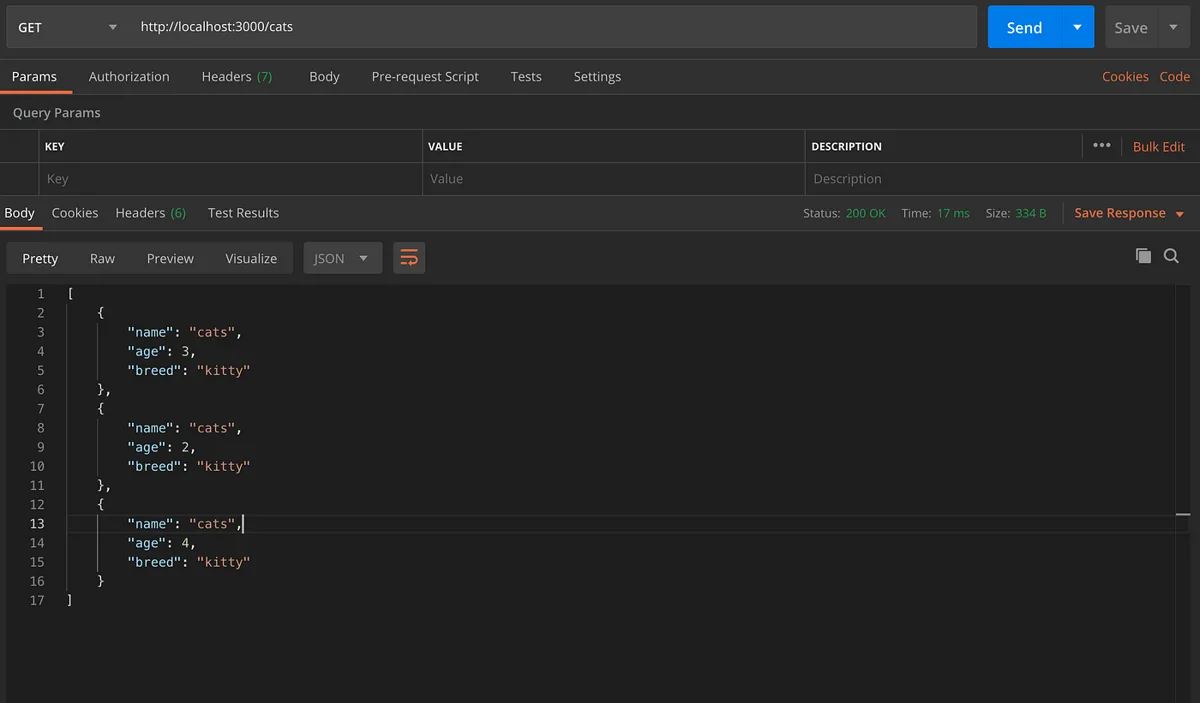
จากส่วนนี้จะยังไม่สามารถ check static type ของ variable ตอน runtime ได้จนกว่าจะมีการใช้งาน pipes ซึ่งจะพูดต่อเป็นหัวข้อถัดไปครับ
Pipes
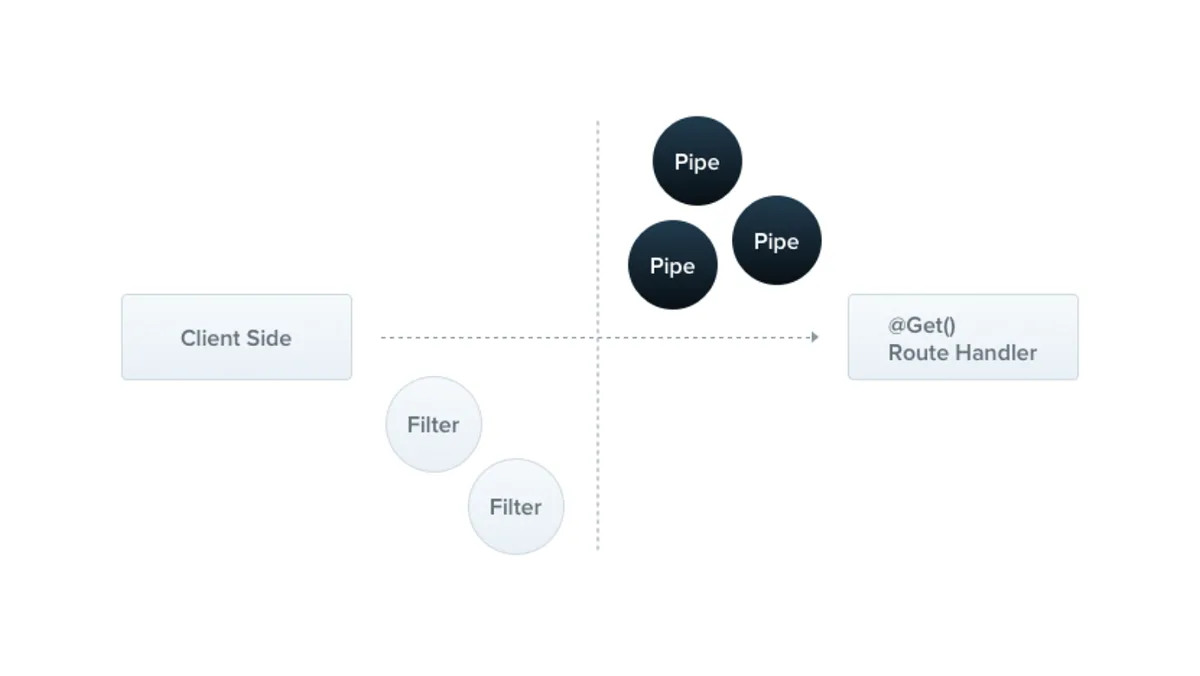
pipes มีหน้าที่หลักอยู่สองอย่าง
แปลงค่า input ให้ output เป็นไปตามต้องการ
validation type ของ input ว่ามีควาามถูกต้องหรือไม่
ก่อนอื่นทำการ install
yarn add class-validator class-transformer
ตัวอย่างการสร้าง pipes validator ขึ้นมา
nest g pipe validation
จากนั้นเราจะได้ file แบบเดิม คือ file test และ file validation
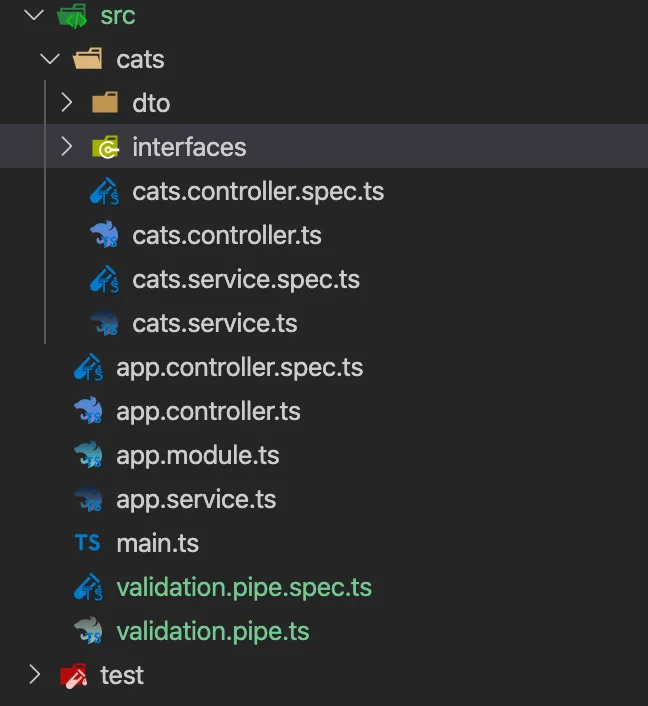
ทำการแก้ไขไฟล์ cats.dto.ts
และแก้ไข file validation.pipe.ts
ต่อด้วยแก้ file cats.controller โดยเรียกใช้ ValidationPipe และใช้งาน UsePipes
จากนั้นเริ่มใช้งานกันครับ
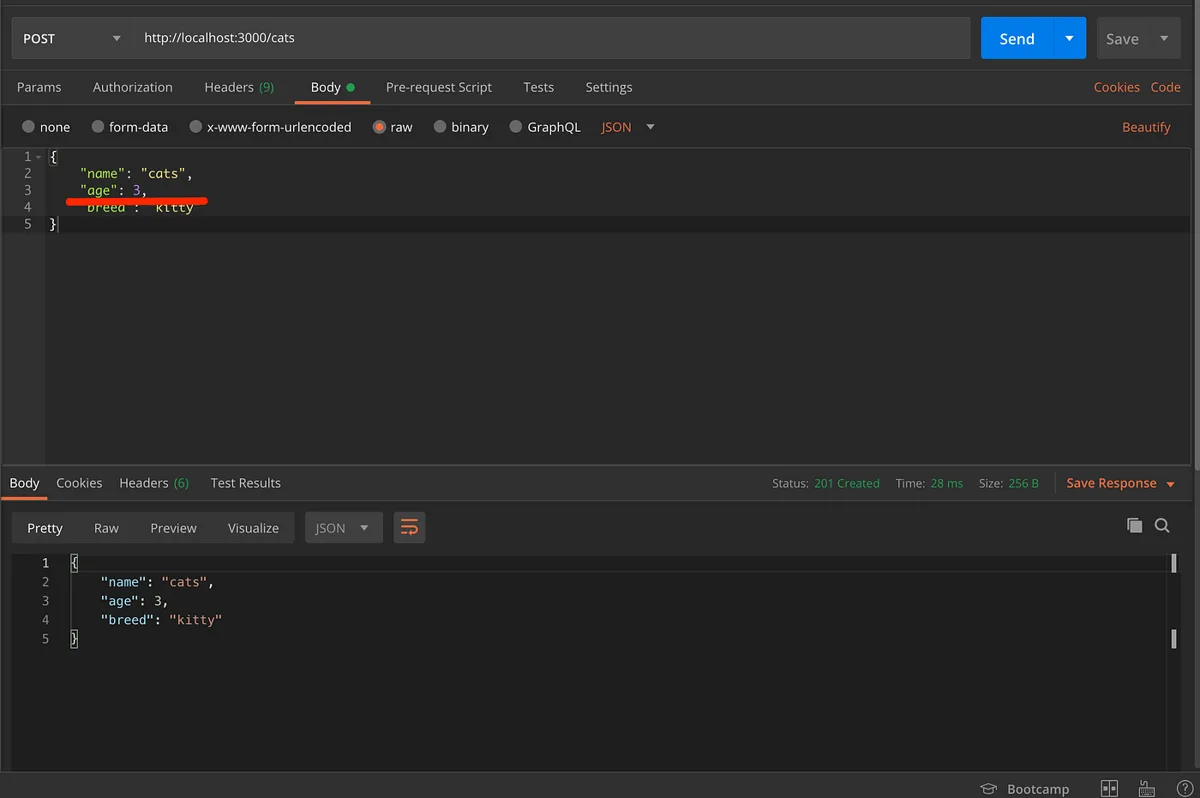
methods POST มีการใช้งาน ValidationPipe เมื่อส่ง data ที่มี type ตรงกันกับที่กำหนดไว้จะสามารถทำงานได้ปกติ
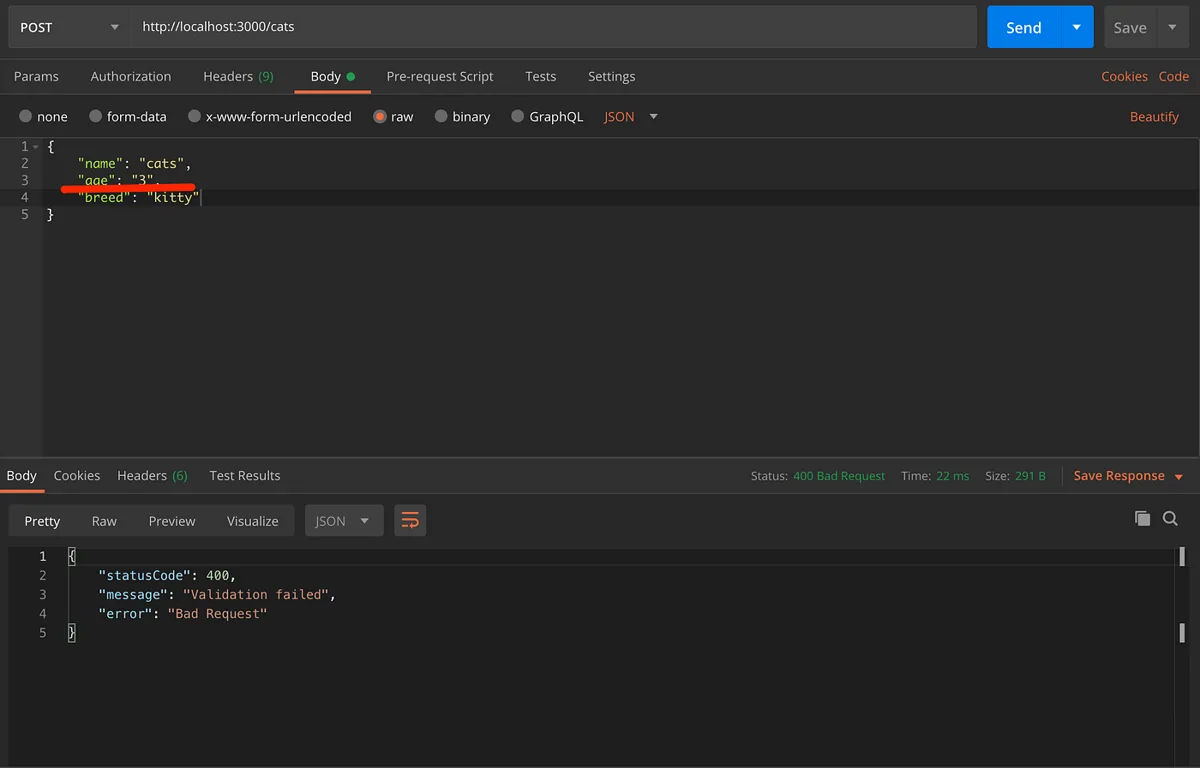
เมื่อส่ง data ที่มี type ที่ไม่ตรงกันกับที่กำหนดไว้จะ return bad request กลับมา
Modules
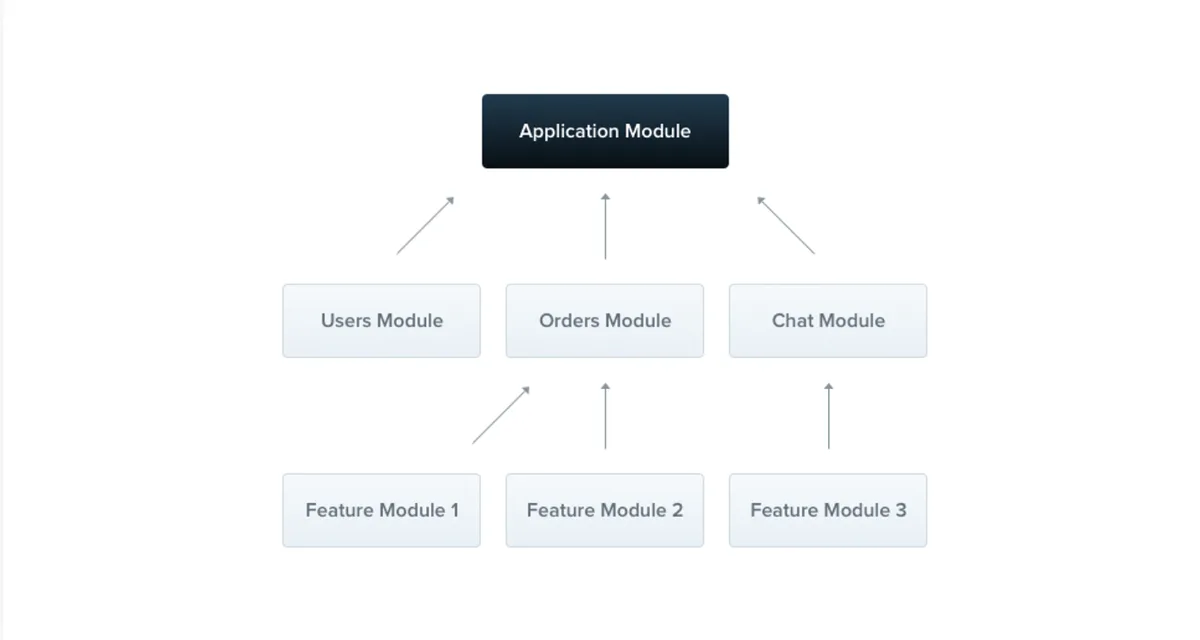
NestJS application จะต้องประกอบด้วย modules อย่างน้อยที่สุดคือ root modules ( app.module.ts ) และ root modules จะเป็นจุดเริ่มต้นในการ build NestJS โครงสร้างของ NestJS นั้นจะแยกออกเป็น modules ย่อยๆ และภายในจะประกอบด้วย provider relationships และ dependencies ต่างๆ
มาลองสร้าง modules กันเลยครับ
nest g module cats
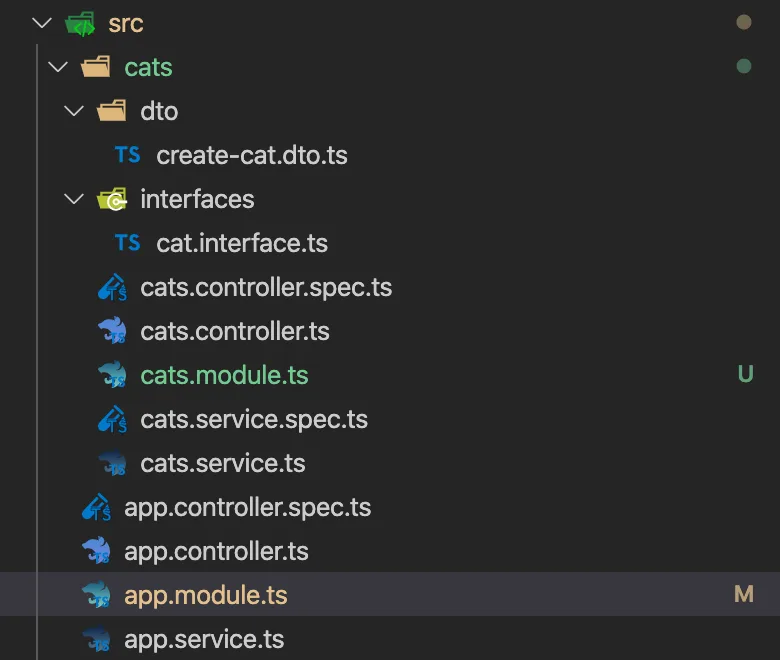
จากนั้นทำการแก้ไข file cats.module.ts
และแก้ไข file app.module.ts โดย imports Module ที่สร้างขึ้นมาเข้าไป
และเราก็มาถึงส่วนหัวข้อสุดท้ายของบทความครับ
Middleware
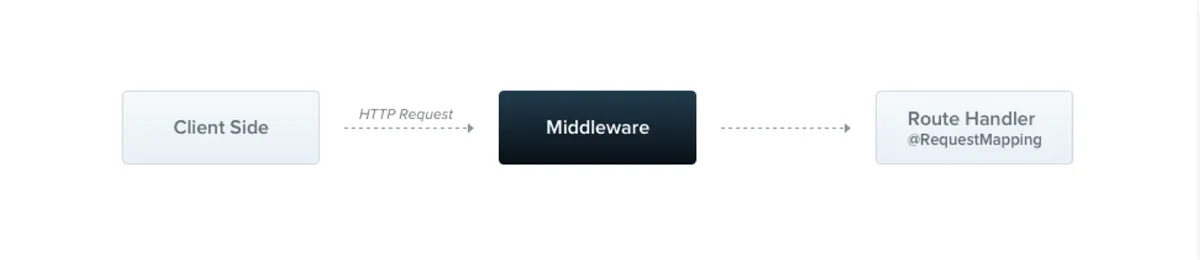
middleware เป็น function ซึ่งจะถูกเรียกใช้ก่อนจะถูก route handler และ Nest middleware ใช้งาน default middleware เดียวกับ express
nest g middleware logger
เมื่อเราสร้างเสร็จแก้ไข file logger.middleware.ts
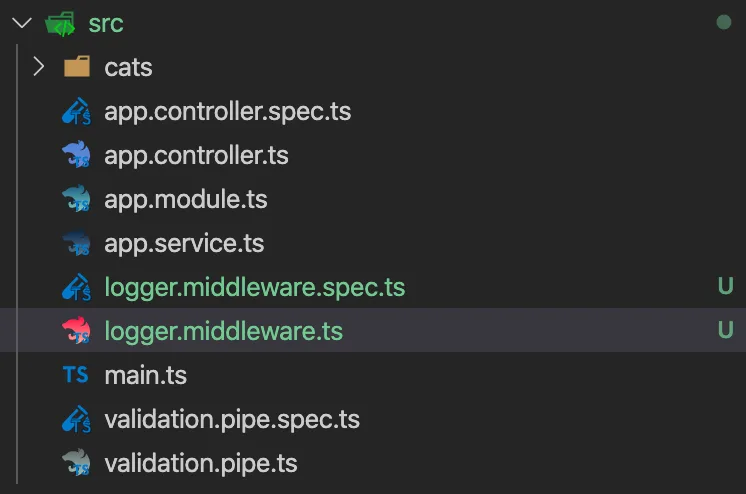
และทำการแก้ไข cats.module.ts
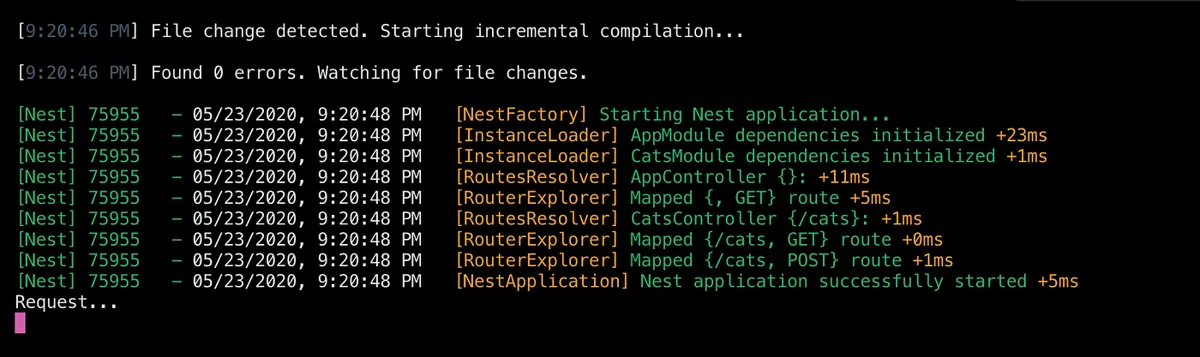
จากนั้นทำการลองยิง request ที่ http://localhost:3000/cats ทั้ง 2 methods คือ GET และ POST จะเห็นว่า route GET นั้นมีการ console แต่ route POST ไม่มีเนื่องจากมันถูก exclude ออก
จบแล้วนะครับสำหรับบทความเเนะนำ NestJS แบบ basic ซึ่งบทความนี้อ้างอิงจากตัว Document ของ Nest เอง สามารถตัวเพิ่มเติมได้ที่
Documentation | NestJS - A progressive Node.js framework Nest is a framework for building efficient, scalable Node.js server-side applications. It uses progressive JavaScript…docs.nestjs.com
ดู code github ที่ https://github.com/noppadollanngain/example-nest/tree/feature/section_1
ส่วนบทความหน้าจะเป็นอะไร รอติดตามกันได้นะครับ
บทความที่เกี่ยวข้อง
เทคโนโลยี
TypeScript คืออะไร? แล้วคุณรู้หรือไม่ว่าใช้งานยังไง
บทความแนะนำภาษา TypeScript ว่าคืออะไร ทำไมถึงควรเรียนรู้ และช่วยให้การเขียนโปรแกรมปลอดภัยและจัดการง่ายขึ้นอย่างไร
เทคโนโลยี
มาทำความรู้จักกับ Lodash กัน
ก่อนอื่นเลยต้องขอสวัสดีพี่ๆน้องเพื่อนๆ ชาวโปรแกรมเมอร์ กันก่อนนะครับ สำหรับ Blog นี้ผมจะพาทุกๆคนไปทำความรู้จักกับ Libary…
เทคโนโลยี
Multiple Language ด้วย i18n บน nuxt.js Framework
สวัสดีครับ พอดีผมได้มีโอกาศลองใช้งานเจ้าตัว i18n เห็นว่าเจ้าตัวเนี่ย มันใช้งานค่อนข้างง่ายพอสมควรครับ วันนี้เลยจะมาแชร์ถึงการ setting…